
This article explains how to install the GATB Tutorial Virtual Machine on your computer.
Content of the VM
The GATB Tutorial Virtual Machine is intended to be used during the GATB Programming Day. It contains all the necessary material to run GATB tutorial codes whatever operating system you have on your computer.
The GATB Tutorial VM is a 64bit Debian 7 Linux and provides you with:
- a lightweight UI desktop (LXDE)
- c/c++ compiler (gcc 4.7)
- Geany (UI-based c++ code editor)
- pre-compiled GATB 1.2.0 library
Requirements
All you need to run the GATB Tutorial VM is:
- one of the following 64bit operating systems: Windows 7+, MacOS X or Linux
- VirtualBox 5.x from Oracle
The VM requires 4 Gb of RAM to run.
Checking/Installing VirtualBox
As stated above, you’re going to use a VM, so you need a tool to execute that VM on your system.
So, first of all check that VirtualBox 5.x is installed on your computer.
If you cannot find VirtualBox, then proceed to the web site of Oracle to freely download and install VirtualBox.
Installing GATB Tutorial VM
Step 1: click on this link to download Debian-7-GATB-ready.ova, a 1.4Gb binary file containing the VM.
Step 2: start VirtualBox
Step 3: select command “Import Appliance” from menu “File” to open the following dialog box:
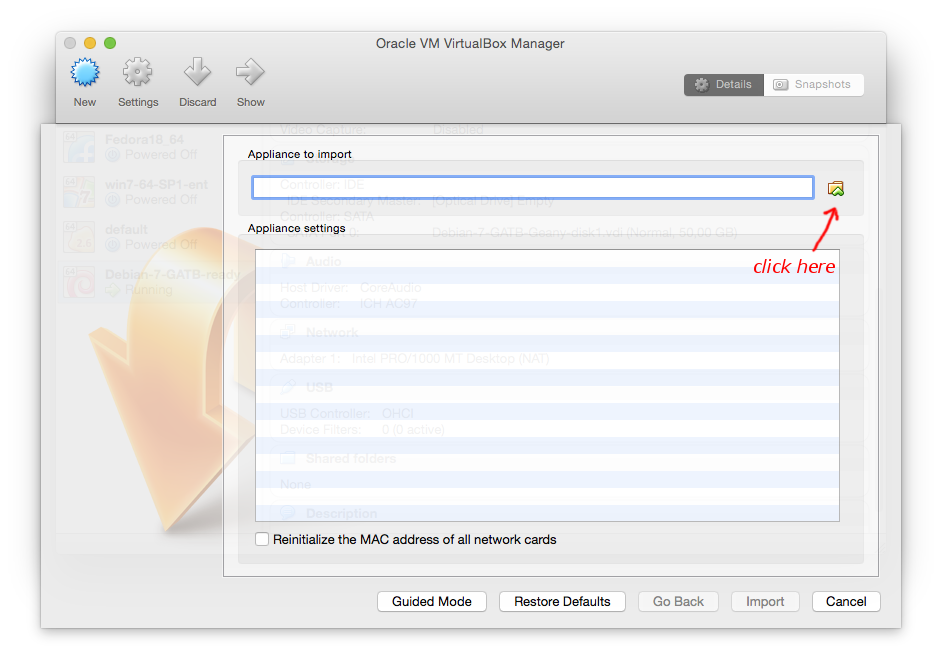 Click on the little “yellow folder” icon (see picture, above) and select the Debian-7-GATB-ready.ova file downloaded earlier (see step 1). You will see this content:
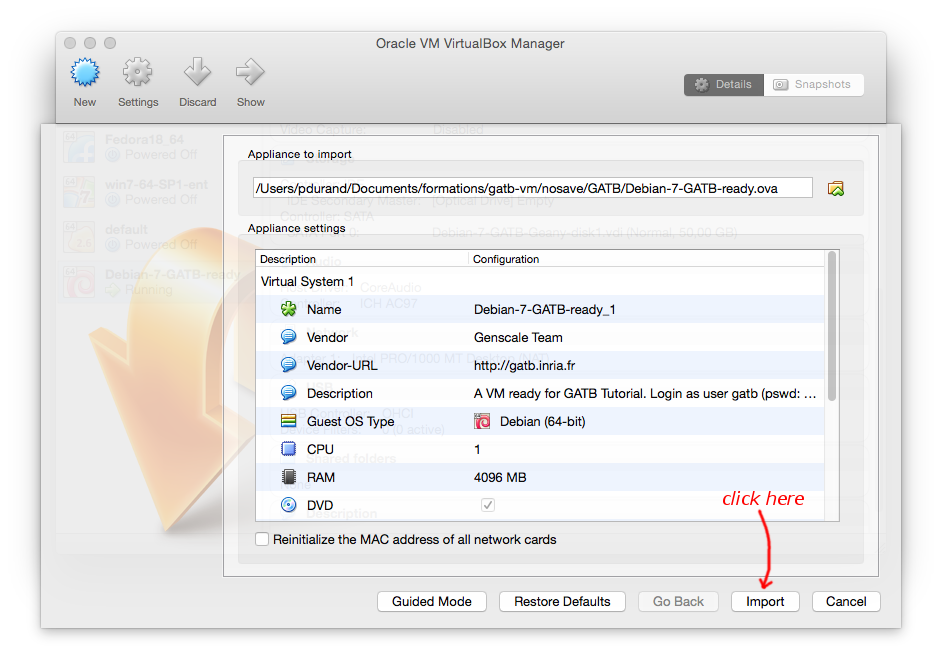 Then, click on the [Import] button… and keep calm, importing the VM will take a few minutes.
Step 4: start the VM! Simply select the VM called “Debian-7-GATB-Ready” and click on the [Start] button. Let the VM gently start and you’ll see this:
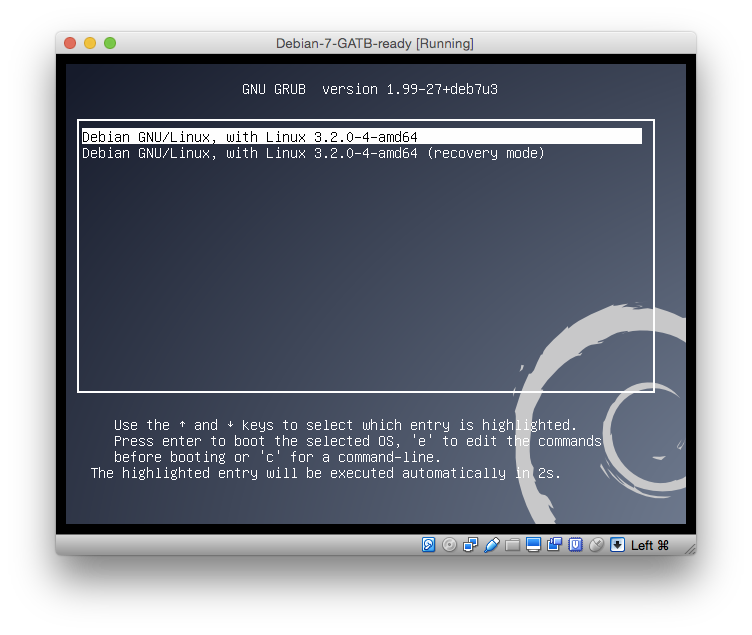 VM is starting … VM is starting … |
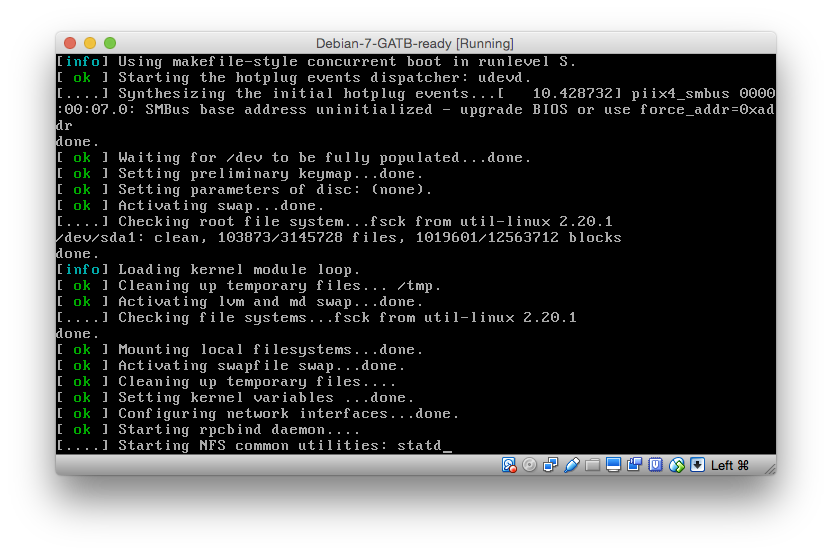 … still in progress … … still in progress … |
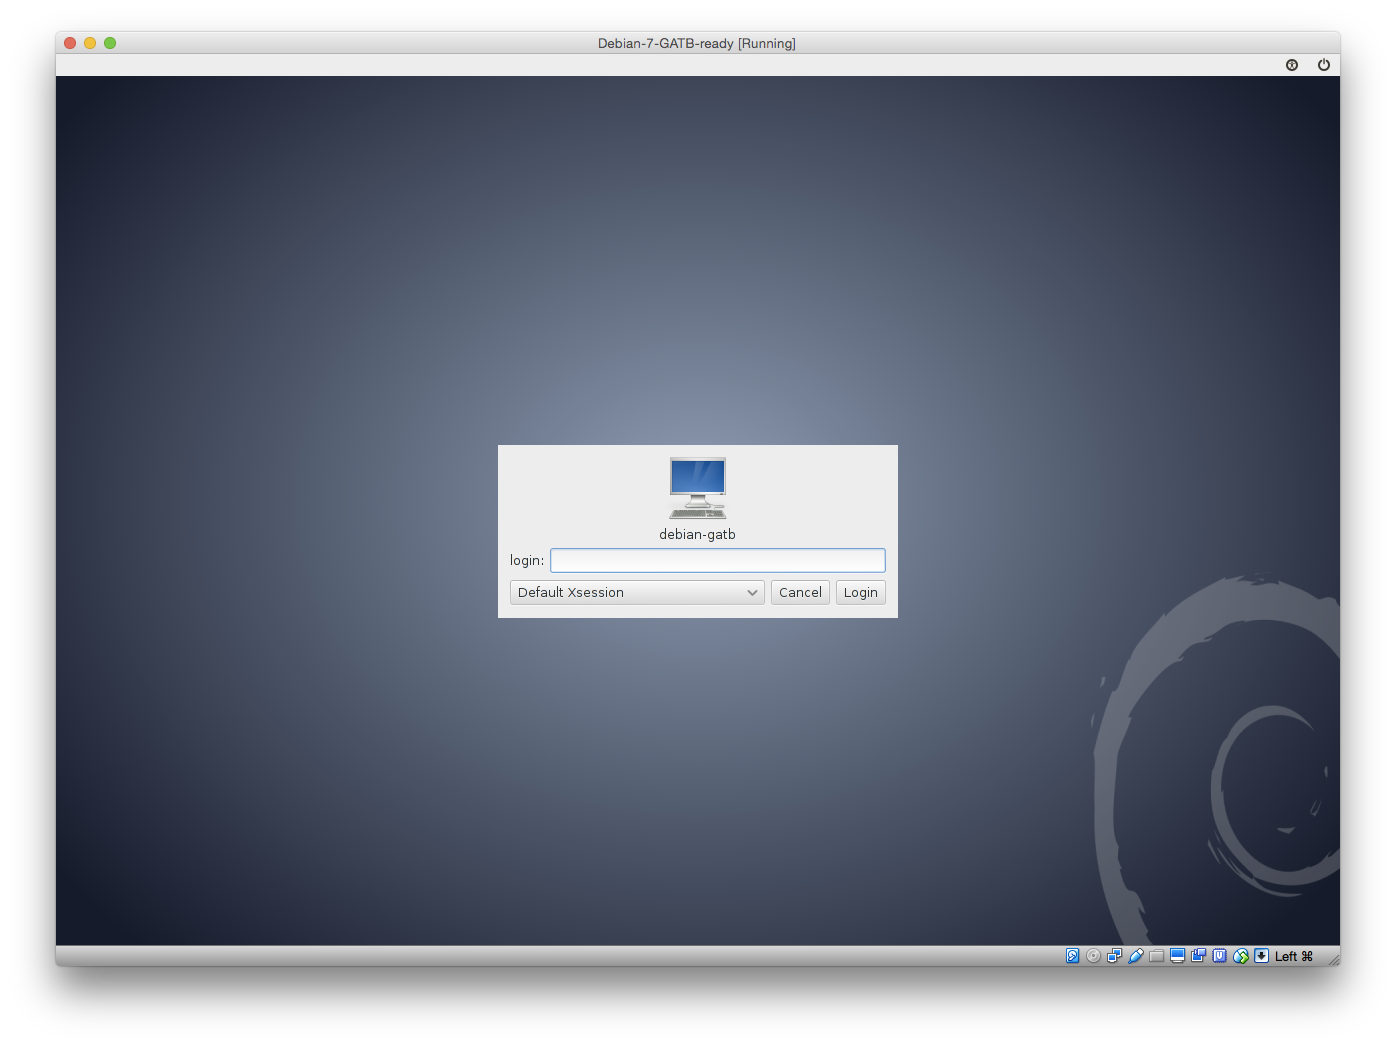 … well done! … well done! |
Step 5: no more… see you during the GATB Training Session and we’ll provide you with the login/password and additional material to work with GATB using the freshly installed VM.
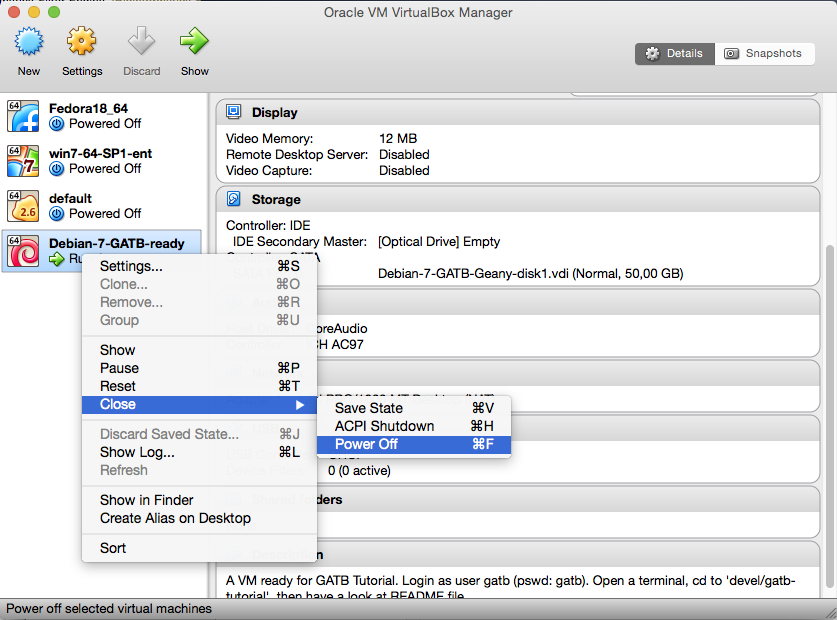
For now, simply power off the VM, as follows. From the VirtualBox frame, right click on the GATB-VM and select Close, then Power off:
Share a local folder (optional)
VirtualBox enables to automatically mount a local folder (i.e. a content of your computer) into a VM. To enable that feature, proceed as follows:
1. From VirtualBox:
a. select the GATB VM
b. go to Settings->Share Folders, then add a local folder.
When adding the folder, let ‘Folder name’ to empty and check only ‘Auto mount’.
2. Start the GATB VM, and log in as ‘gatb’ user.
3. Open a terminal, then type:
su –
adduser gatb vboxsf
4. Then simply log out, log in to the VM: you should have access to:
/media/sf_share
with rwx permissions. That folder actually points to the local folder of your computer.